Proxmox Homelab - Host Installation and Setup
Proxmox Install
First we will want to install the Proxmox host. I'm going to assume you have already done this, but you'll want to download Proxmox and put it on a flash drive using Rufus. To start, we want to only have the NIC plugged in which will be reserved for the host. In my case, it will be a cheap 100mb I bought for $2. So the only things you'll want plugged into the host should be mouse, keyboard, monitor, and the one NIC. Plug the NIC into one of the Management VLANs on the switch. Boot up the machine and make sure to boot to the USB drive.
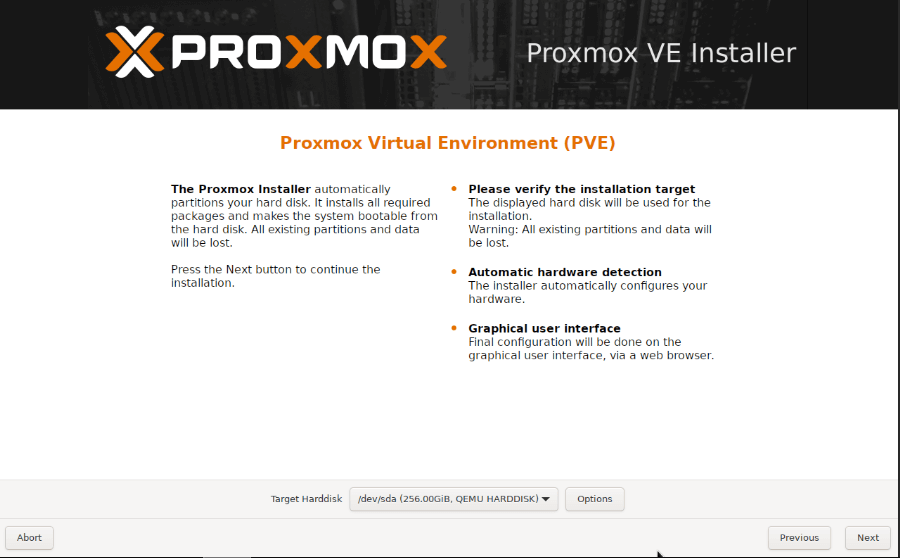
Boot into the Proxmox installer and accept the EULA. Now you should be at the target hard disk screen. For this, you'll want to target the SSD that you will be using dedicated for your host. In my case, it's going to be a 256GB SATA SSD; it should probably be the smallest, slowest drive you have since we won't be using it for anything other than the host. Fill out you location and timezone information on the next page, and then enter your host password and email after that.

For network setup, make sure that the management interface is set to the USB NIC you are using. It should be the only one with the green next to it, since we only have that interface plugged in. Put in a FQDN (just something like "your network name.local" or whatever), and then put in the rest of the info for your management connection.

At the next screen just hit install. After the installation finishes it will reboot, and then you should be able to reach the host management page at the host IP address, port 8006.
Updates
The first thing I like to do is run updates. Sometimes there will be weird issues that pop up, especially when trying to migrate a VM and then I find that one of the hosts is not as up to date as the others and the issue is fixed after applying updates. Go to the Node name > Updates > Refresh, then run Upgrade. You will see a couple failures in the Output area; this is normal happens because of the enterprise repository which is only available with paid support. You can safely ignore and hit "y" in the command prompt window that opens up to complete the updates. I do like to run the script from Proxmox VE Helper-Scripts. This will disable the nag window when logging in and correct and clean up some repositories. I do make sure to not disable high availability and I don't update, because I prefer doing that on my own.


NIC Setup
Now we'll set up the network interfaces. Remember, we want all the interface naming conventions to be the same across all hosts. This is necessary for smooth VM migrations and high availability. So the host NIC is vmbr0, storage network vmbr1, and tagged traffic on vmbr2. First I like to make a backup of the interfaces file to have a known good copy of it. Go to Node name > Shell and copy the interfaces files to interfaces.DEFAULT, or whatever name you'd like to differentiate: "cp /etc/network/interfaces /etc/network/interfaces.DEFAULT"

Here is my current Proxmox Network setup.

I like to kind of document in the comment area what the port is and what it is bridged to as I set this up. I can see that vmbr0 uses enx00e04c360095 as the bridge, so I add those details to the comments for those interfaces. No we can connect the cables to the NIC on the motherboard and the 10GB SFP link. From here, because I use USB, onboard, and PCI-e network adapters, it makes it easy to figure out which NIC is which. USB NICs usually have a long name starting with enx, NICs on the motherboard usually eno#, and the 10GB usually enp2s#. Apparently the naming convention is en = ethernet p2 = the bus number s0 = the slot number.
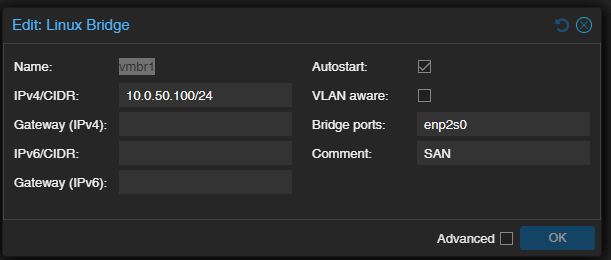
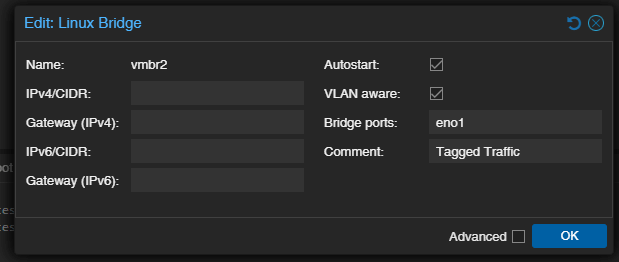
So we do Create > Linux Bridge. Bridges basically act like a switch and uplink to the rest of the network outside of Proxmox. First we create vmbr1 which will be for the SAN network. All we need to fill out is the IP info and the bridge port. Click OK and then we'll create one more Linux Bridge. This connection, vmbr2, will be used for tagged traffic and will be used for the VMs. All we need to add here is the bridge port and make sure to check VLAN aware. After applying the configuration, go into Shell and ping something else on the SAN network to make sure that's working. We'll test the tagged traffic uplink later, once we have an LXC we can use.


Misc Settings
That is about it for the initial host installation and setup. Do the same for the other two nodes, making sure to keep the same naming convention for the interfaces in regards to which network they are connecting. To form the nodes into a cluster, go to Datacenter > Cluster > Create Cluster. Make sure that the IP address is set to Management, and Create. Copy the join information, then go to the other two nodes and use the Join button for them to join the cluster.
There are a few more things I like to change in the settings. First under each host go to Host node > System > Options > MAC address for WoL. I add the MAC for the management interface so I can use my jump server for this if needed. Go to Datacenter > Options. Change migration settings to the SAN network, so that migrations occur over the 10GB network instead of over the slower management NICs. One other thing I like to do is change the migration from secure to insecure. Since this is on a private network without internet access, I'm not worried about encryption. This will speed up migrations to about a second. To do this we need to edit a file on the host. Go to Shell and edit /etc/pve/datacenter.cfg and change secure to insecure: nano /etc/pve/datacenter.cfg

Use CTRL + O and CTRL + X to save and exit.
