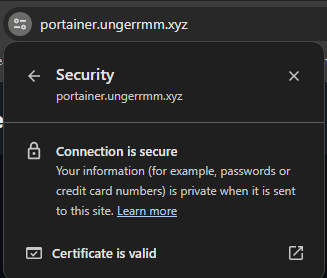
Although a minor inconvenience, having browsers warn me about my internal sites gets old, especially once you start self hosted more than 20 or so services. We want to use a DNS provider to provide a certificate for our internal services, while keeping the services themselves safely behind our firewall. The goals of this project are twofold: Get rid of the HTTP warning browsers give; To comply with the idea Zero Trust, HTTPS will have end-to-end encryption even on the LAN.
Prerequisites
- Own a domain
- Have either Docker or Proxmox to run NPM on
- Use a local DNS server
Overview
- Prepare API key on DNS provider
- Set up Nginx Proxy Manager for certificates
- Add domain names to NPM
- Add domain names to local DNS
Guide
Set up API key
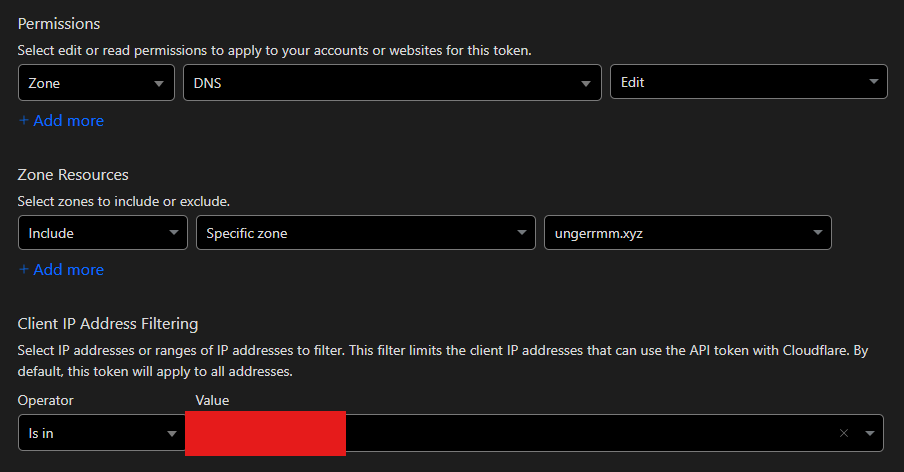
You will need to own or purchase your own domain for this, and for the nameservers make sure it is one that NPM supports for using the DNS Challenge (next step). We will be using Cloudflare for our nameservers. You will have to follow the instructions for your DNS provider if you use something else. First, we will create an API key for Nginx to use for the DNS challenge. Go to your Cloudflare profile (upper-right hand corner, My Profile) and go to My Tokens. Create an API token using the Edit zone DNS template. The only thing you should have to change from the defaults is under Zone Resources change it so that it is only for your one specific zone. The one I have filled in is just something I use for examples, I do not actually use that domain. You can also fill in the Client IP Address Filtering field if you have a static IP like I do. Click Continue to summary and then Create Token. Save the API token somewhere for the next step.
Set up SSL certificates.
We will be using this reverse proxy for it's ability to create certificates. We DO NOT want this or any internal services we are using with this to be routable from the internet. In my production environment I use it in a Docker container so I recommend that, but to make it easy we will be using a script. Use the script here (many thanks to tteck for all of his amazing work) if your are using Proxmox.
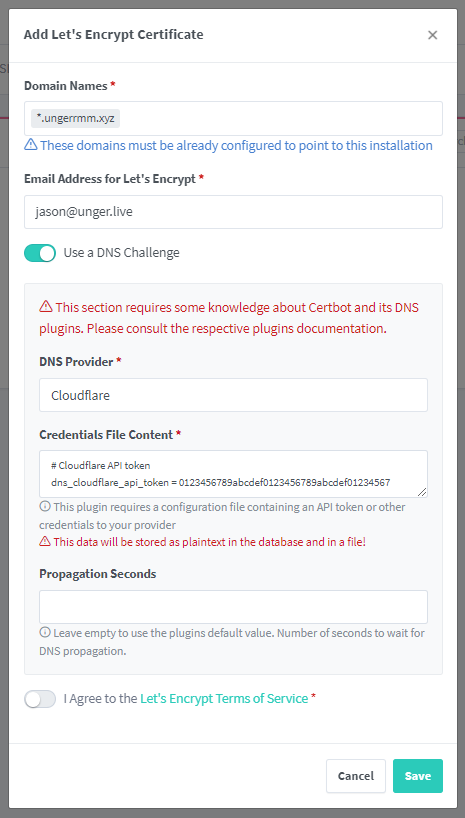
With NPM set up, go to the SSL Certificates area and click Add SSL Certificate. For the domain name, we will use a wildcard. If we do not do this it will cause every subdomain we have to be registered, something we do not want people to see. Check Use DNS Challenge and replace the prefilled letters (012345...) with your API key. Check the I Agree... and click Save.

Add self-hosted services
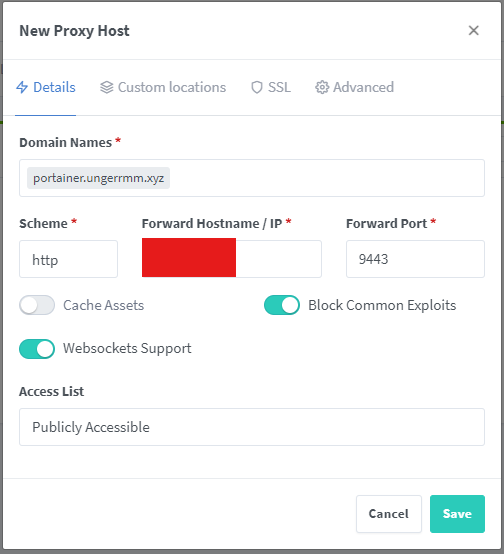
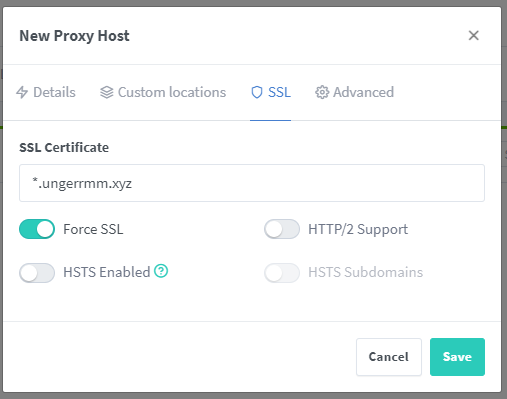
Here is where we will add the services to NPM. Go to the Hosts > Proxy Hosts area in NPM and click Add Proxy Host. Fill in the domain name for how you want to access the service, then the IP and port the service is on. Switch to the SSL tab and select the wildcard SSL, then save. Go through and add all of your services here.
Add DNS entries
We will need to add static entries into our local DNS server. Go to your DNS server, in my case Pi-Hole, and add all of the services that were added in NPM. Point the IP to NPM's IP address.

Now when you navigate to those pages use the domain name and you can use HTTPS on them. Note - this will not work on all sites and some you have to manually change some things in NPM to keep the original client IP in the header. I have not delved into this too much but may in the future.
